Rule 5 | Highlight the line
5.1 How to highlight the line?
20 min.
Use your thumb to warm-up your highlighted lines.
Which one is your dominant eye?
Miles Test
Extend both arms in front of you, creating a small triangle between your thumbs and index fingers. Focus on a distant object through the triangle with both eyes open. Then, close one eye at a time. If the object remains in view when one eye is closed, that eye is your dominant eye.
Script
Hello and happy sketching!
Let’s have a look at the crossing lines with our thumbs.
When we have a thumb, then we have an object that is close to the eye. And this means that actually we see two images of this object. One is more seen from the left and the other one is more seen from the right. So we have two totally different images and this we can prevent by closing one eye and only looking through one eye. So we have the possibility to reduce the third dimension to two dimensions. And this helps us to draw more easily and so we can have more fluttering lines and crossing lines.
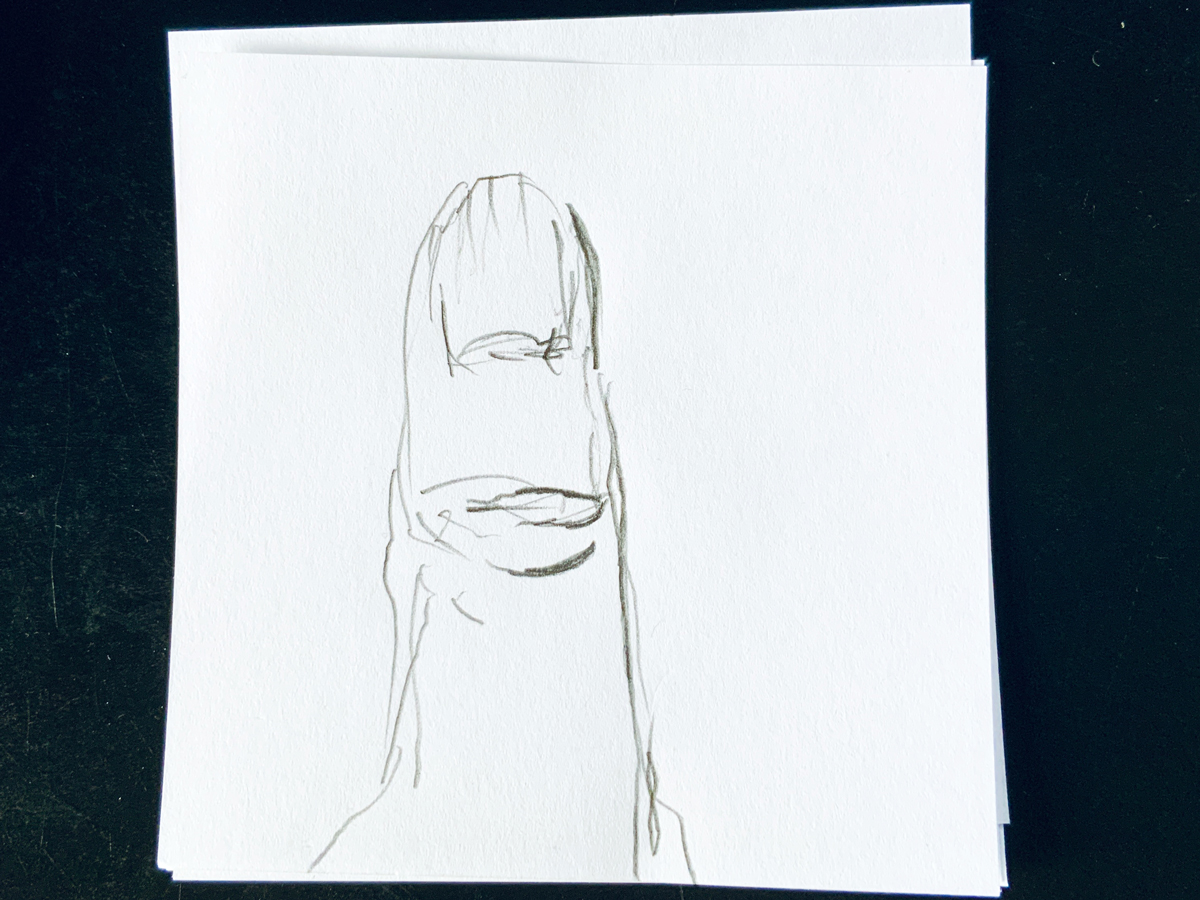
So let’s start with the lesson or with a closer look to our dom. When we look at our thumb we have lines that are quite voluminous, the outer lines. And those are difficult to draw because they are kind of perfect. And then we have fluttering lines. They are a little bit more crinkled here and here as well. This is the easier part.
But how can we deal with the different lines here where we have actually one line. So here we have a line that is a little bit more voluminous. And then we have a line that is a little bit more voluminous. And then we have a line that is a little bit more voluminous. And then we have a line that is a little bit more voluminous. And then we have a line that is a little bit more voluminous. And then we have a line that is a little bit more voluminous here …
So here is the advantage again that if we have different lines and we give our brain the opportunity to choose the line then our brain will help us. So let’s start maybe here with this point of the thumbnail. I draw just small hints to say where I start. And I define the width of my thumbnail and the length of my thumbnail. Just with small hints. And then I define the width of my thumbnail and the length of my thumbnail. Just with small hints. Just with small hints. I can do this. This helps me to start. So I think it’s even almost equal in width and length.
And here is the form that starts to come here. And here we have the part that is called the moon in German at least. I don’t know what’s the specific name. And I start with this form. Maybe I have already made too many lines. And then we have the line that goes out here.
And here. And this is quite difficult because here we have different lines. And what we can do here now is we can offer the eye or the brain, sorry, many lines. Even here. Many lines. Many lines. Two lines. Crossing lines. And then our brain will find the right spot. It’s not here and it’s not here. But it’s maybe somewhere here.
But let’s see what happens when we draw on. And we draw the other lines. And then we have the line that starts to come here. And here we have the line that starts to come here. And then we have the line that starts to come here. And here we have the line that starts to come here. And here we have the line that starts to come here. And here we have the line that starts to come here.
I have my buckles here and here, but actually, so when I see it from my point of view, it’s not quite the same as the camera has, but here there should be something like this. But I hadn’t this before, but my eye fills it in, because we have learned that the system of a thumb is something like this, and then we have something like this here, and then we have here, where the joints are, a little bit of an outdent, and then it’s going on. And that’s why, because we have this kind of knowledge in our brain already, even mistakes like this disappear, and this helps us, mistakes like this disappear, and this helps us in sketching. We need not full preciseness, but a little bit of it. Try it out, and I think it’s even a good exercise to do.
To see what others do is good to know for the benchmark of other students.
So have a look at the gallery. I will build a community of thumbs up for happy sketching. Enjoy it.
Thank you.
Step 1 | Take a photo of your thumb
„Thumb shift: this occurs when the left eye doesn’t show the same image as the right eye.“
„Small things right in front of us are complicated to draw. This is because they are made up of two images that our brain merges: one from the right eye and another from the left eye. This makes it extremely difficult. But you just have to keep reminding yourself: if you close one eye, drawing becomes much easier.“
You always have two ways to solve the problem. Reduce the third dimension by taking a picture. Or close one eye.
Start with makeing a photo and zoom in for the details of your thumb. Study your finger for some moments. Then go over to sketching.
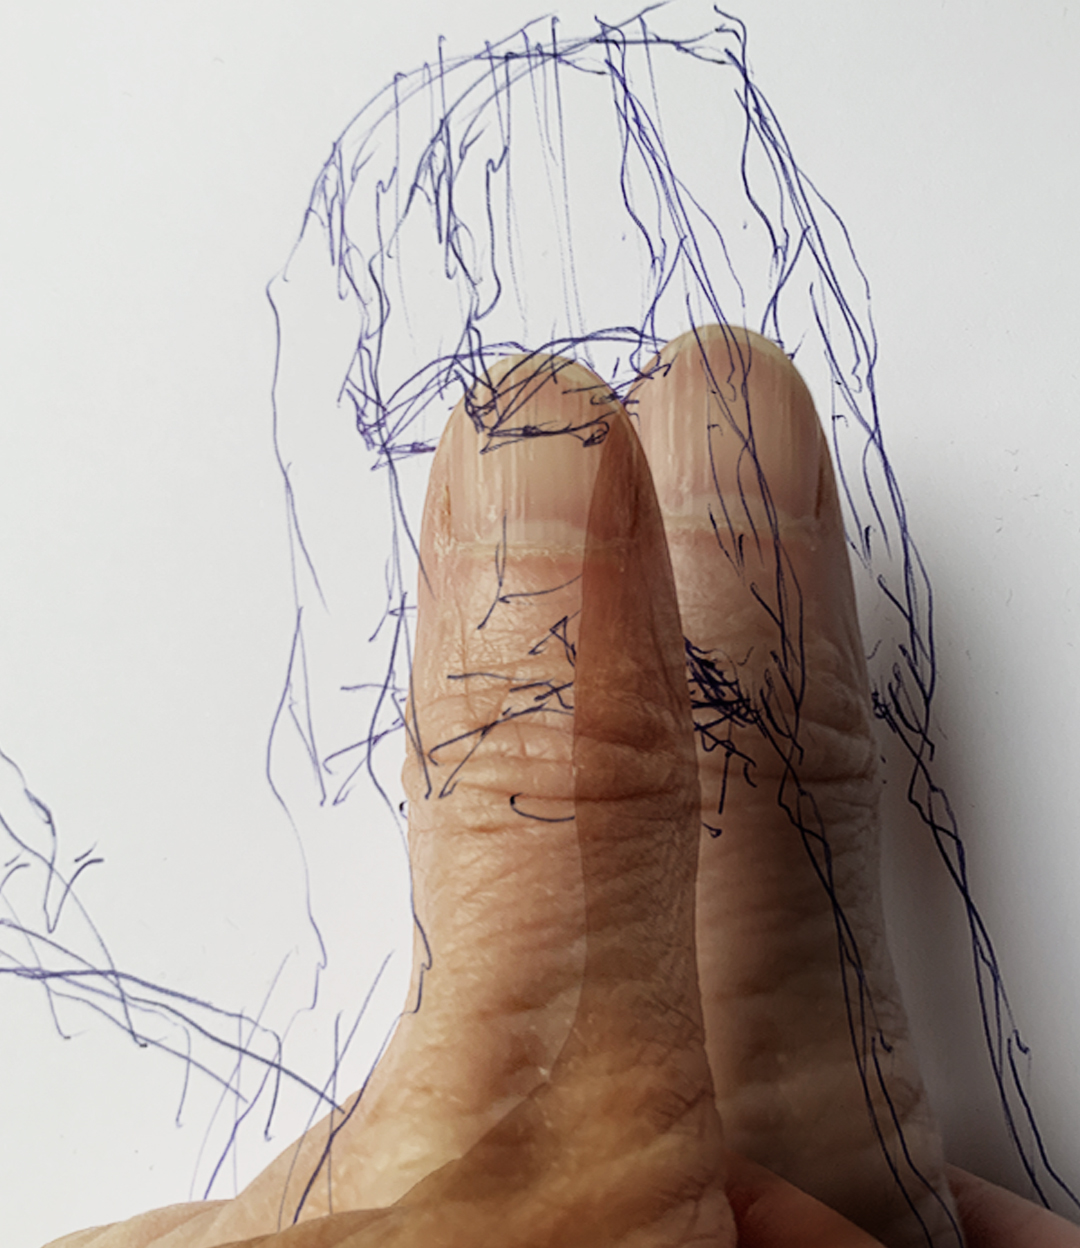
Here you can see the effect of what happens, when you look with both eyes.
Step 2 | Close one eye!
This reduces the the third dimension – to only two dimensions
Step 3 | Thumbs up! Squint your eye slightly and look through your eyelashes! That way we can see the light-dark contrasts better.
Look at your thumb in every detail? Where are the wrinkles, where are the little skin flaps, where are the curves, where are perhaps even hard formations.
You can also take your smartphone and take a photo of your thumb, then set the contrast to maximum. This may help you to recognise the dark areas of the picture of your thumb.
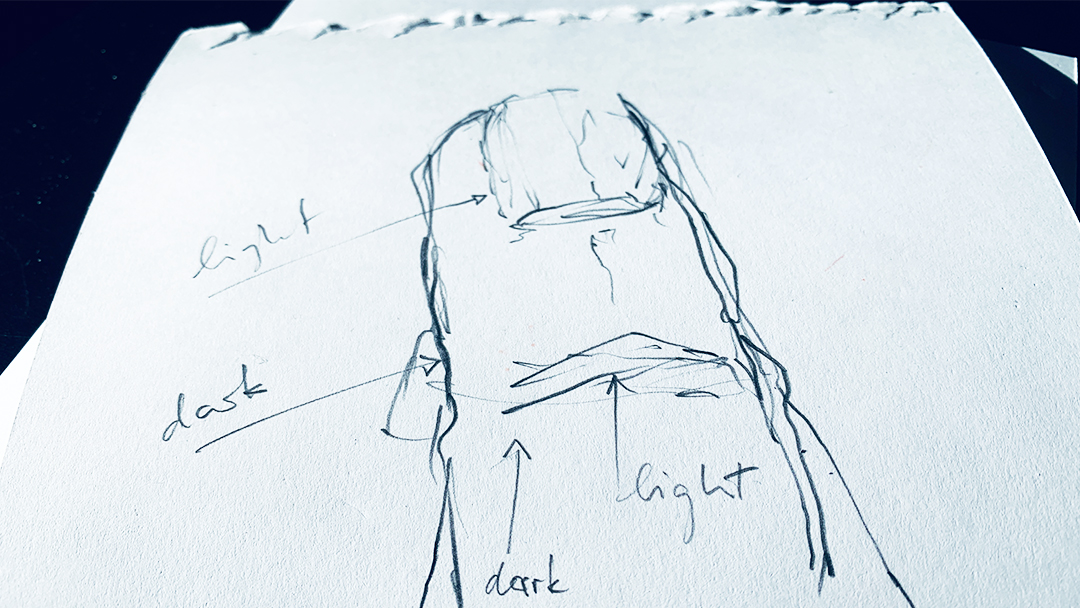
ASSIGNMENT | Sketch your thumb!
To upload, use the buttons further down.
Free trial
Try one lesson and decide if you want to do the whole course. Click for the free trial ...
Certificate
If you want to achieve a certificate that proves your sketching skills, get all your information here ...

