Rule 1 | Let the line flutter
Lesson 2 | Material
60 min.
The right material is crucial for the success of the sketches. A fluid stroke, a line of the appropriate width, whether digital or analogue, helps to give the right expression. There are suitable tools available and often these are suitable because they bring the right conciseness and the width of the stroke is in proportion to the drawing.
Step 1 | Watch, read and see what you need for sketching
A video introduction and some descriptions of the most needed materials
Watch the video and grab your material. Setup a pencil case to have all your tools at hand.

Script
Pencil and paper
Actually, it takes very little. An open-pored paper, that is, a paper that is not too slippery. And of course, it needs a pencil, an HB pencil. HB means half bold, i.e. semi-hard. It allows us to make strokes that are deep black and thick as well as strokes that are fine, narrow, and light.
The HB scale hard and black
The hardness and the darkness of pencils are determined by the graphite grading scale.
H in the HB scale stands for hardness.
B in the HB scale stands for blackness.
F means that the pencil sharpens to a very fine point.
The harder the pencil lead inside is, the higher the number next to the H is.
The softer the pencil lead inside is, the higher the number next to the B is.
The hardness is determined by the amount of clay added to the pencil leads.
Blackness is determined by the lack of clay in the lead. The blacker the pencil mark is left, the more graphite is in the lead.
There are different lead diameters available. The normal pencil is 0.7 -0.8 mm in diameter.
H pencils are used for constructions and technical drawings because they have not so much contrast. Whereas B pencils leave a bold mark and are fine for drafting, sketching and drawing.
For this course here we mainly use UB to 6B pencils.

Kneading rubber
A kneaded rubber is helpful. It allows the lines to be lightened. This is especially helpful if you have so-called false lines. You can then simply draw the right line over it and the eye hides the wrong line.
On the other hand, if you use a conventional eraser, you run the risk of either damaging the paper, which looks ugly, or simply leaving a smudge. We prefer to put the conventional eraser aside. To me, the rubber is more of an enemy than a friend.

Water-soluble pencil
The water-soluble pencils are also very good. They can be erased like normal pencils. But you can paint the strokes like a watercolour with the brush in a second step.

Water colour
I myself really like the watercolour box for the colouring of the sketches. I can use it to combine objects as a whole or to create a colourful mood. I always use fine tones. They should only give the eye a hint, evoke the inner image.
Pen and ink
With the fountain pen, you can draw beautiful lines that vary in width. There are a large number of inks and fountain pens, the easiest and best way is to use an ordinary nib because that way the hand is used to the writing implement.

Copic markers
Also helpful are Copic Markers, which are acid-free felt-tip pens. With them, one can blend the colour longer than usual. So we have fewer clouds, respectively, you can paint over and over so that the surface becomes soft like a watercolour surface.
There are different brands, here the original with two different tips, one flat and one-pointed. I like the pens of the brand Tombow, because they have a point like a brush.
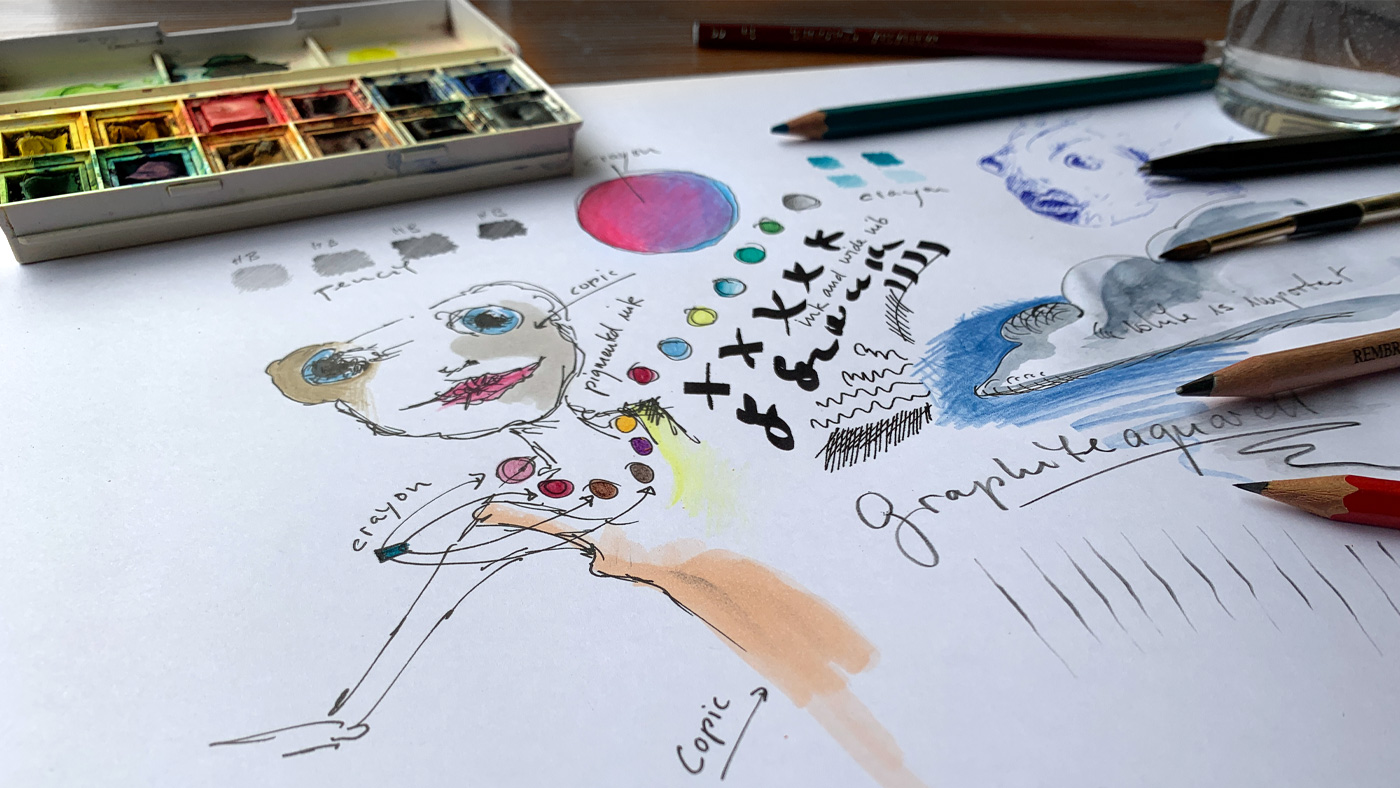
step 2 | try out your material and make first experiences
A good workingplace and materials are the two most important requirements for good work. Therefore it is important to start with the right material.
40 min. |

The case
A pencil case is therefore advisable so that everything is always there:
HB pencils
4B pencil
6B pencil
some crayons
eraser
kneading rubber
sharpener
watercolour box
fine brush
a small vessel for some painting water
fountain pen
wide nib fountain pen
some Copic markers
…
possibly ballpoint pens, felt-tip pens, …

Paper
And you will need a huge pile of paper. You can work on all papers that are not varnished or too slippery. The best choice is a matt-coated offset paper or ordinary copy paper. It is advisable to use large paper so that the paper does not affect the edge of the drawing. A3 is a good starting format. But also small shreds are very suitable for the beginning. Because the fear of destroying the beautiful paper would be a hindrance.
Table
As a good base, a small pile of paper is the best starting point, as the paper is just soft enough so that the pencil can dig a little into it. Do never work directly on the table. Use always something soft beneath.
Now it is time to go and get your drawing material ready. Do it!
ASSIGNMENT | Make your experiences sheet and upload it
To upload, use the buttons further down.
Free trial
Try one lesson and decide if you want to do the whole course. Click for the free trial ...

Certificate
If you want to achieve a certificate that proves your sketching skills, get all your information here ...