Rule 2 | Work with line bundles
Lesson 8 | Landscapes inspired from Dutch Baroque
45 min. |
Now you are heading to real nice drawings. Get inspired by artists and learn how to work with the lines.
Step 1 | Fill your thesaurus of visuals
Let you inspire by the arts and draw your very own landscape
Browse landscapes on Rijksmuseum for inspiration first.
Step 2 | Watch the video and learn about possible ways
It’s always good to know how one can start.
Lean back and watch, listen, and enjoy.
Script
Hello and happy sketching.
I’m here at the Rijksmuseum and in the collection of Sketch&Dand. So I made a collection of all images that belong to the second rule, so edited for every rule. But here we are in the second rule collection all the images that you can use for your work are here. The task is that we want to develop our observation skills and improve our fluttering line bundles. And that’s why we are going to do what we do very often. We are going to observe some good examples and how they are made.
There is a concept in every drawing and even in Dutch drawings, it’s very often like this that you have a flat horizon. This is clear because there are no high mountains in the Netherlands. And you have in the background fainter lines, not so many contrasts. You have a middle ground here, a little bit more of contrast. And you have a foreground with the large things and the greatest darkness. Darkness means always something in the foreground. Darkness doesn’t exist in the background because of the light perspective. So that all that is far away is getting blurred and is getting grayer.
So why do we focus on landscape drawing? There are actually four reasons to do that. It’s about developing observation skills. You have to fill your brain with images and this you do by looking closer. And this is what I really ask you to do here in the Rijksmuseum. You can also learn from the pictures to improve your composition skills with this horizon, faint lines, and no darknesses. Darkness is in the foreground, middle ground, and composition of where to put the things in a picture. So you see, we always start in the pictures from the left, going to the right. So they welcome us in the foreground and let us go in the background.
Then it’s always about enhancing your creativity skills. So you see, there are a lot of solutions. When you look closer, you can really learn a lot of strokes. You see, these are pine trees, these are leaf trees. So how did he do with the strokes and how did he work with the strokes and other parts of it? And you see, there always is not only one solution and there are always a lot of solutions here that you can really see.
And there is a fourth reason why sketching landscapes is always a good thing. Because it’s stress relaxing, it’s stress relieving, it’s relaxing anxiety. And very often this means as well that you are really in nature, or that when you are not in nature but online, you can feel like you were in nature. This also helps to focus your creativity, so that you can immerse in your inner image, in your inner mind, in your inner world. This is what we are interested in.
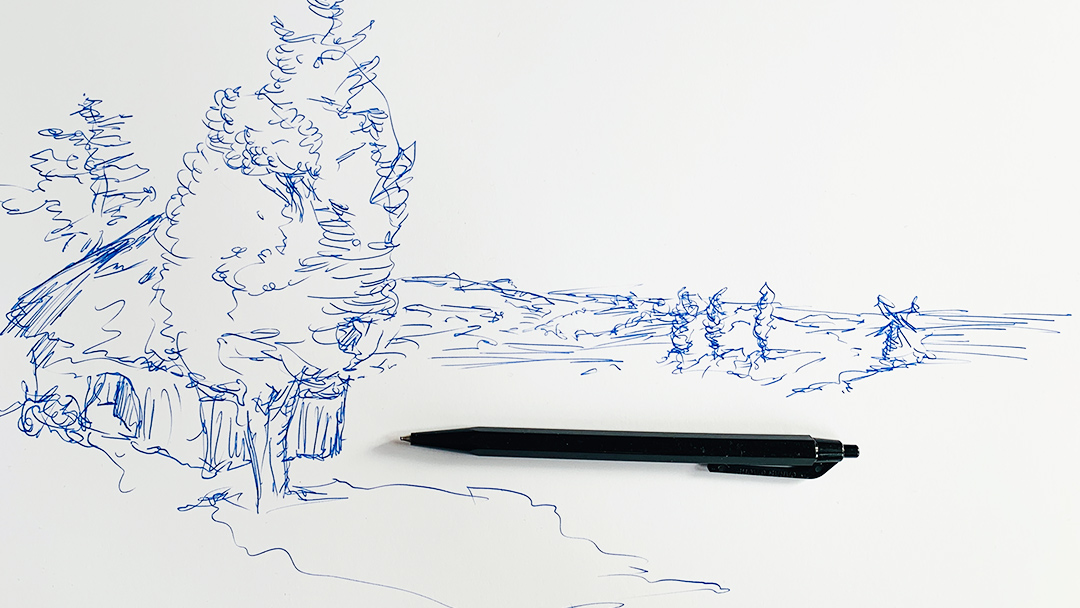
Okay, now I want to go over to the drawing on paper. And this is what I started when I drew and prepared this lesson. You see, actually, I wanted to focus on a part that is in the foreground here. Then I have a middle ground and I have a certain rhythm that takes up again this entry thing. So I told you that we very often start from the left and go to the right. And I have a kind of great ouverture. And then I’m going to repeat this ouverture. So this opener and by other means of sketching here. So I ask you to take whatever sketch you want or whatever inspiration well you want for your sketching.
I take this one. I think this is quite beautiful to work with. And that’s why I’m doing this. A little bit apart here. So you have seen it or you have it on your blog, so you can follow it. You can have it. And I start with this faint line. I work with line bundles and you learned no harsh or thick lines, no bald lines in the background. But this is what I want to depict with many lines that here, somewhere in the background, there is a background. Okay, I get inspiration from this part here. This is a forest, I think. And this is a church tower. This is very useful to orientate in the flat country like the Netherlands. And that’s why I think it’s important that I can draw this. You can even guess that there are some roofs here. I don’t know. But these are small forests and those are some lines of bushes that divide the part here. So what I’m going to do is I get inspired by these lines there. And I want to do something similar, but not like a slave. I want to do it on my own.
And here I just want to do something like an outline. But he hatched it. Sometimes I think it’s not so nice to hatch, but this is very individual. Maybe you like it gives a little bit of greyness of darkness. And here I start again. This inspires me here. So I have a border of the forest here. And then I have another border here. So this is closer. I want to take up this idea. So I want to do here a border that is behind. But here I have another part of the forest that is here. And I want to have some lines for the darkness here, something like this. And then here this church tower. I don’t want it’s too much dominance, but I want some lines to go in. And I want to have some seams of the fields here. And then I have, … I want a row of … This is a row. So I make many five, not only one. This is like an alley. And it goes through it.
Okay. And then here comes the large trees and the seam of the next field here. And here again, those are the trees. In some branches you can very often see that the branches enter the trees so that you have the main branches to the leading branches that go into the form. And then behind you have all the leaves. Maybe you can even make more details and so on and so forth. Something that I want to show you. I worked with this pencil here from Lira. It’s an acquarel graphite pencil. And there is something very useful you can work with because it’s called aquarel. This means when I only have water. So no color on my pen, on my brush. Here is my brush. There is nothing on it, almost just water. And when I make it wet and I work on my pencil line, it helps me to give some tone. So now all the color is taken from the grey of the graphite and it gives me the possibility to give a little bit of shade. You will then deal with it later in the 9th rule. A little bit of shade in just with some water and a brush. Okay? That’s it.
So develop your very own inner landscape and enjoy it. Enjoy it and that’s it. Happy sketching.
Sketching landscapes can be very beneficial for sketchers for several reasons
Enhances creativity: Sketching landscapes can also enhance a sketcher creativity by providing a source of inspiration and new ideas. The natural environment is full of unique and interesting shapes, colors, and textures, which can spark imagination and creativity.
Provides a stress-relieving activity: Sketching landscapes can also be a great stress-relieving activity. Spending time in nature and focusing on the creative process of sketching can help to reduce stress and anxiety, and promote a sense of calm and relaxation.
Develops observation skills: Sketching landscapes requires careful observation of the natural environment, which can help to develop observation skills. By studying the shapes, colors, and textures of the landscape, one can learn to see and appreciate the beauty of the natural world.
Improves composition skills: Sketching landscapes can also help to improve composition skills. By studying the different elements of the landscape, such as the horizon line, foreground, and background, one can learn to create a balanced and visually pleasing composition.
Overall, sketching landscapes is a valuable practice for sketchers, as it can help to develop observation and composition skills, enhance creativity, and provide a stress-relieving activity.

Clump of Trees with a Vista, Rembrandt van Rijn, 1652
drypoint, h 124mm × w 210mm
To date, the location of this cottage remains unknown. Rembrandt came here regularly to draw or etch the house hidden in the wood. Here he used drypoint, scratching directly into the etching plate. This creates a burr, a raised ridge that yields a velvety line when the print is pulled. It mirrors the effect of a sketchy drawing with a subtle interplay of light and dark.

ASSIGNMENT | Get your drawing of a landscape with trees and more stuff.
To upload, use the buttons further down.
Free trial
Try one lesson and decide if you want to do the whole course. Click for the free trial ...

Certificate
If you want to achieve a certificate that proves your sketching skills, get all your information here ...